
Before You Begin
- You must have access to your Facilipay dashboard with permissions to manage settings.
- Decide which permissions the key needs before you start, so you only grant the access required.
Step-by-Step: Create a Custom API Key
- Log Into Your Dashboard Log into your Facilipay dashboard.
- Open API Keys Click Settings from the left-hand menu, then select API Keys.
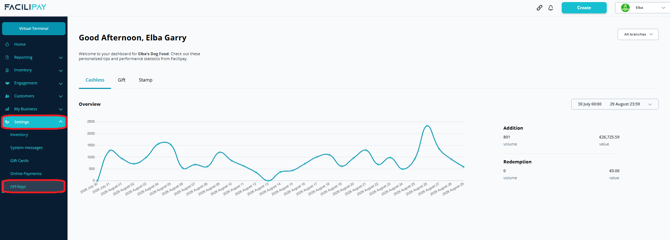
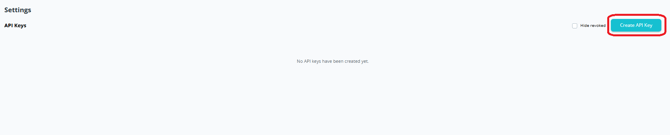
- Start a New Key Click Create API Key in the top right of the screen.
- Configure the Key In the pop-up box, configure the details of your custom key:
- Alias — the name you want to give the key.
- Expiry (optional) — set an expiry in years, or leave blank for no expiry.
- Permissions (optional) — choose from Read Only, Reporting, Inventory Management, Order Management, Payment Processing, or Full Access.
- Select Permissions Use the tick boxes to add or remove specific permissions from the key.
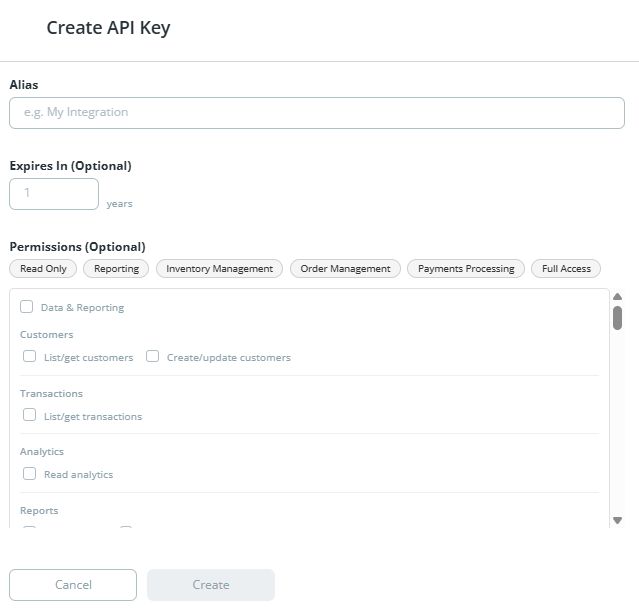
- Save the Key Confirm your selections to generate the key.
Tips & Best Practices
- Grant only what's needed: Use the narrowest set of permissions the integration requires, rather than defaulting to Full Access.
- Set an expiry for temporary use: If a key is only needed for a limited time, set an expiry rather than leaving it open-ended.
- Explore the developer docs: For further insight on available endpoints and permissions, visit our developer page at https://developers.facilipay.io/#description/introduction.