
Before You Begin
- You must be logged into the Facilipay Business Portal with access to the Reports section.
- Apply any filters you need before exporting — the export reflects exactly what is on screen.
Step-by-Step: Export a Report
-
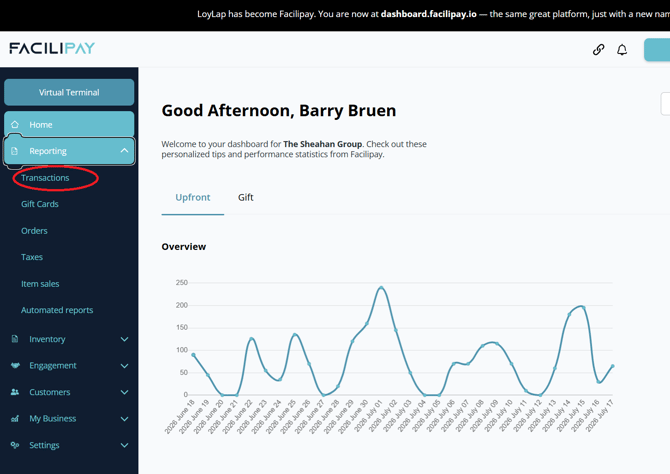
Hover Over Reports
From your Facilipay Dashboard, click on the Reports tab in the main menu.
-
Select the Report Type
Choose the report you want to export. Available options include:- Transactions
- Order Ahead
-
Apply Filters
Once inside your selected report, ensure the correct data is displayed by applying any required date range, branch, or category filters. -
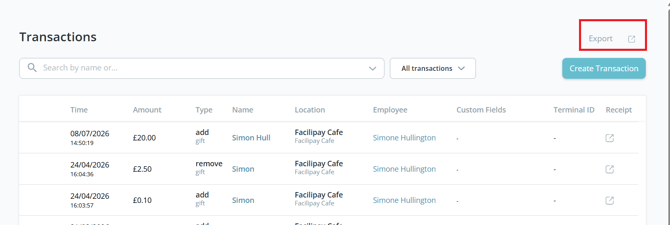
Click Export
Click the Export button in the top-right corner of the page. The system will export the report exactly as it appears on screen.
-
Download and Open the File
A confirmation will appear in the bottom-left corner once the export is complete. Click the downloaded file to open and review your exported data.
Tips & Best Practices
-
Filter first: Use date range and other filters before clicking Export to keep file sizes manageable.
-
Use shorter date ranges: Splitting large data sets into weekly or monthly exports makes analysis far easier.
-
Keep records regularly: Schedule routine exports for bookkeeping, auditing, and reconciliation with your accounting system.
What You Can Do With Your Export
-
Reconcile transaction data with your accounting or POS system
-
Analyse sales trends by date, branch, or payment type
-
Share summaries with your finance team or accountant
-
Build custom reports or dashboards for business reviews