
Before You Begin
You must be logged into the Facilipay Dashboard with admin access.
Step-by-Step: Create a New Branch
1. Navigate to Branches
From the Facilipay Dashboard, navigate to My Business and select Branches.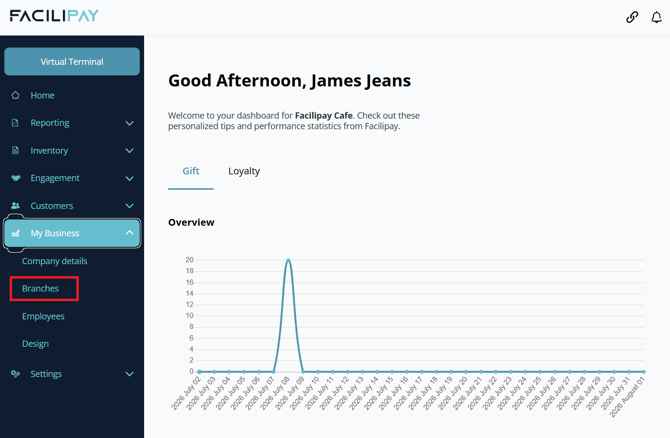
2. Create a New Branch
Click Create Branch in the top-right corner of the screen.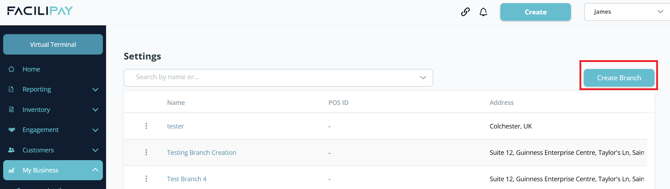
3. Enter the Branch Details
Complete the following fields:
- Name – Enter the name of the branch.
- Phone Number – Enter the contact number for the branch.
- Email – Enter the email address associated with the branch.
- Online Store – Enable this option if the branch will be used for an online store.
4. Create the Branch
Once you have entered the branch details, click Create.
What Happens After You Save
The new branch is created and will appear within the Branches section of the Facilipay Dashboard.
Tips & Best Practices
Use a clear name: Choose a branch name that makes its location or purpose easy to identify.
Check the contact details: Ensure the phone number and email address are correct before creating the branch.
Review the Online Store option: Only enable this if the branch will be used for online ordering.
Need help? For assistance creating or managing a branch, contact support@facilipay.io